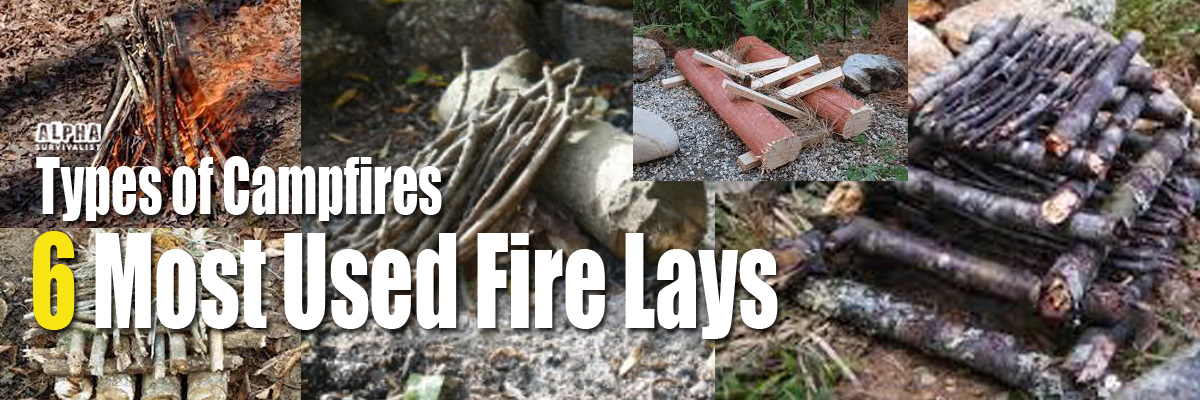
One of the most important skills you can possess when you are out in the wilderness is being able to build a fire. Whether you are simply sitting around the campfire relaxing, or Campfire Cooking. Knowing how to build specific types of campfires, or fire lays to give them their correct name, can make all the difference.
Particularly when your survival depends upon it.
There are many different types of campfires that you can build. Each fire lay suits a different type of situation or fulfills a certain requirement.
The following are the most commonly used fire lays and each one of them will offer something different.
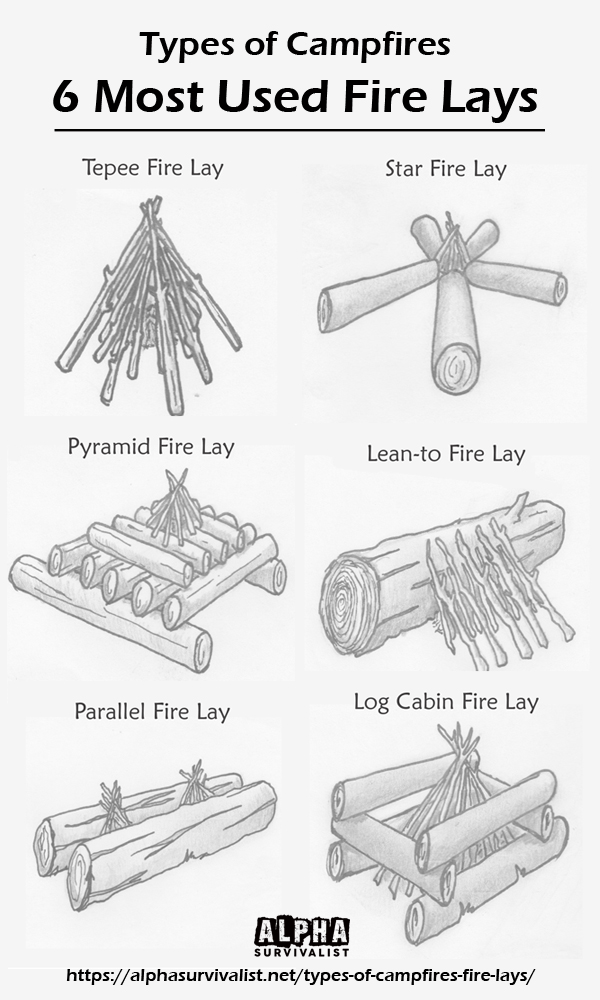
The 6 Types of Campfires that you need to know how to build are called;
- Tepee fire lay
- Star fire lay
- Pyramid, Council, or Upside-down fire lay
- Long, or parallel fire lay
- Log cabin fire lay
- Lean-to fire lay
1. Tepee Fire Lay
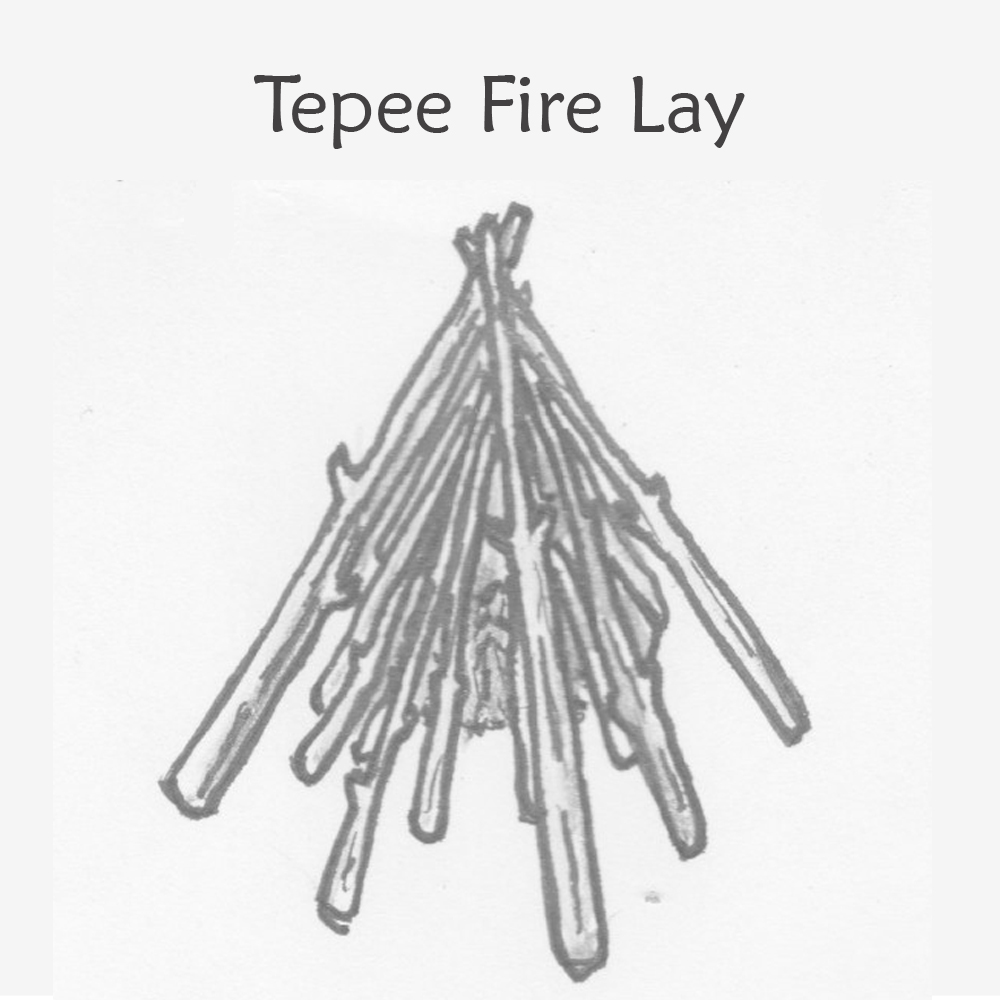 The tepee fire lay is the standard among campfire set-ups. It is the fire lay most people will instantly think of when asked how to build a campfire or what a campfire should look like.
The benefits of a tepee fire lay are that it is very quick to build and catches alight very easily.
The tepee fire will burn hot and is ideal for generating heat quickly and for quick cooking tasks. This is a great fire lay if you need to boil water quickly for example.
The reason why a tepee fire produces a lot of heat quickly is that it’s built to allow a lot of oxygen into the centre of the fire structure.
This is especially true if you make an even larger opening on the side facing the wind when constructing.
The downside of having an intensely burning fire is that your wood supply will diminish extremely quickly. So, if firewood is in short supply in your location then a teepee fire lay is probably not the best fire to build!
Putting together a Tepee Fire Lay
- When building a tepee-style campfire, you begin by placing a small handful of tinder in the centre of your fire area.
- Next, you will need to gather some small twigs and sticks and arrange them around the tinder in a tepee shape.
- Once you have done this, you can begin to add larger pieces of wood to the outside of the tepee, making sure that they are touching the layer underneath so that the fire can easily spread.
- You then basically build a tepee on top of the previous tepee until you reach your required size.
- Grab your ferro rod or waterproof matches or whatever fire starter you have and get your tinder lit.
- That is as difficult as it gets!
You will need to continue to feed the fire to keep it going. You can do so by continuing to lay firewood on the outer layer of the tepee.
Remember, this fire will burn quickly so make sure you have a good stockpile of firewood. You’ll need it!
2. Star Fire Lay
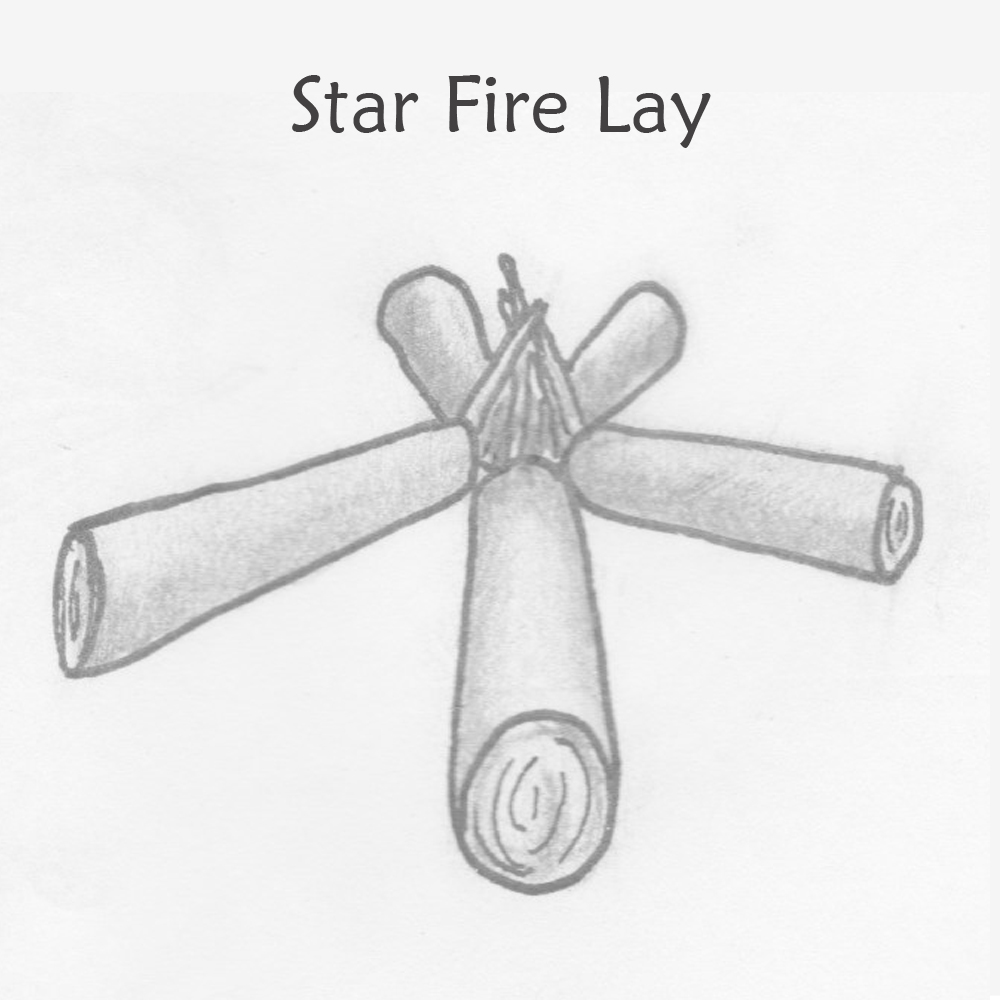 A star fire lay is the polar opposite of a tepee fire, in that it uses bigger pieces of wood that are placed so they burn more slowly and more efficiently.
This is an ideal fire lay if firewood is in short supply and it is for this reason it was often the campfire lay of choice for many cowboys and frontiersmen.
The downside of having a much less vigorous fire is that it produces much less heat.
However, the star fire lay is good for when you need a long-lasting campfire that uses less wood.
Building a Star Fire Lay
- You’ll need to find five or six large sticks or logs preferably, and arrange them like the spokes of a wheel around a small central space.
- You then build a small tepee fire in the space at the centre of the arranged logs using tinder and small twigs and sticks.
- Once the tepee structure has been lit keep feeding it until the log ends closest to the fire catch.
- Once the log ends are burning they can each be slowly pushed further into the fire as they burn.
- Continue to push the logs until they are all but gone and replenish if needs be.
Again, your fire will be small and will not generate a great deal of heat.
But if you do not have an abundance of firewood, need a fire that burns for a long time, and that will provide protection by keeping the wildlife away, then the star fire lay is a perfect choice.
3. Pyramid Fire Lay
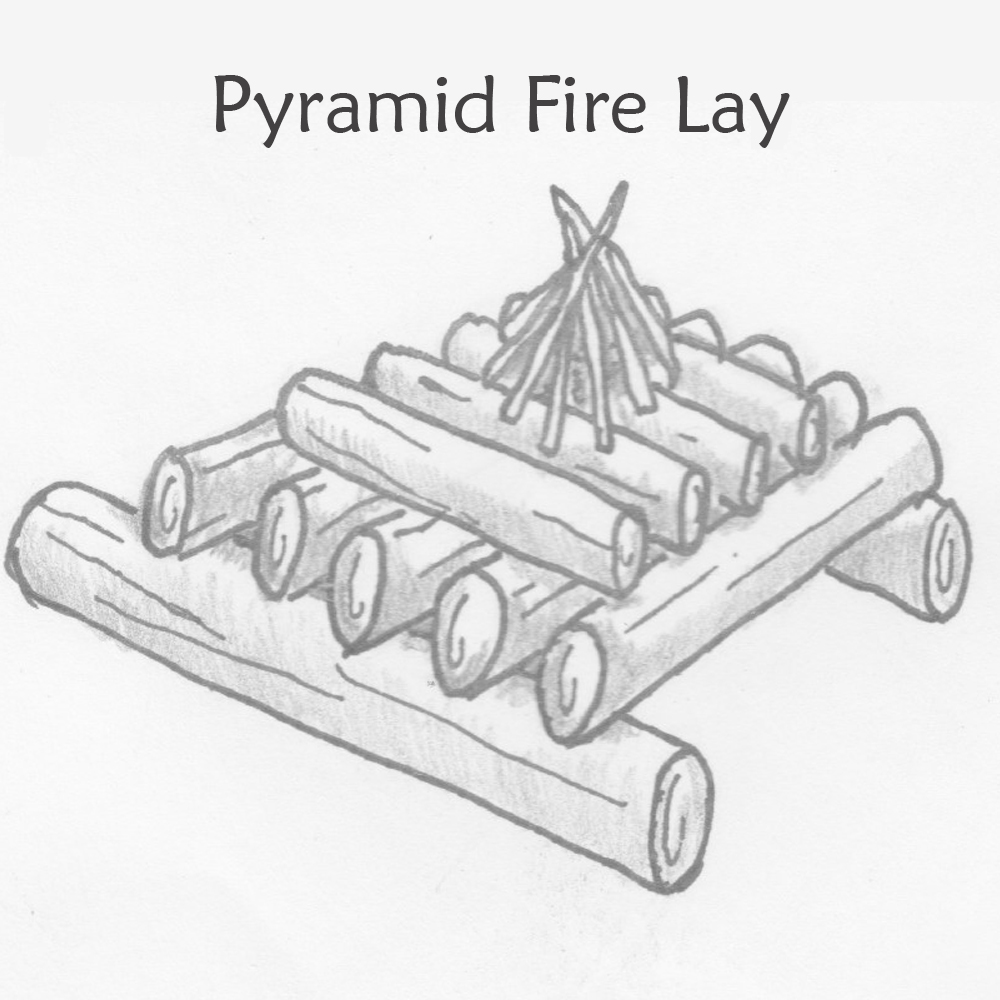 Also referred to as the council fire lay, or an upside-down fire lay. It is the perfect campfire setup if you are looking for a long-lasting fire with the minimum requirement for tending.
This fire lay is constructed so it feeds itself by burning steadily from the top-down, hence why it is often referred to as the upside-down fire lay. This is also the reason why it burns for such a long time.
Note: The reason why this fire set-up is also known as a council fire lay is that it was primarily used by Native Americans when council meetings were being held.
Although a long-lasting fire may sound perfect this fire lay isn’t the best to use for cooking as it doesn’t burn as intensely as some of the other fire lays mentioned here. However, because of the way that this fire burns, it does mean that you will eventually be left with a thick bed of hot coals that are great to cook on.
Setting up a Pyramid Fire Lay
- Start by placing a couple of large logs on the ground parallel to one another a little bit less apart than they are in length.
- Place logs of similar length and thickness across the two base logs.
- For the next level, you need slightly shorter and thinner logs. Place them on top of and perpendicular to the previous level.
- Continue to add layers in the same way, reducing the thickness and the length of log used for each level.
- When you have reached the desired height, build a small tepee fire on top of the final layer.
- Light the tepee fire to start the fire.
- As the fire burns, the logs will eventually collapse inward, self-feeding the fire.
4. The Long or Parallel Fire Lay
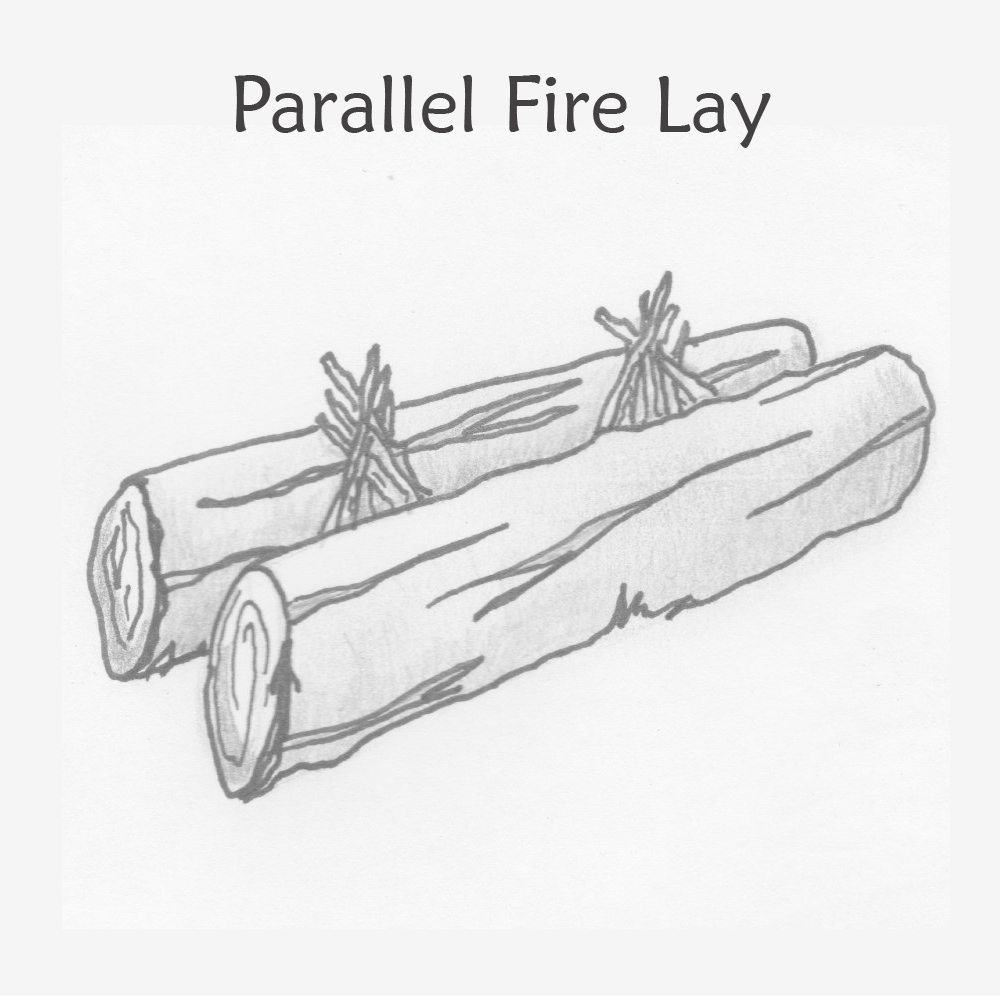 A parallel fire lay is a perfect fire lay for large groups and is great for group cooking as it provides a large cooking area where camping pots and pans can be placed. It should perhaps be called the cooking range fire lay!
It is designed in such a way that air is funneled directly into the fire, creating a much hotter burn and an even heat distribution.
How to Set up a Parallel Fire Lay
- The long fire lay is built by placing two long logs parallel to each other, leaving between 6 inches to a foot spacing between them. It will be much better if you can find green logs if at all possible.
- Once your logs are in place you then build a small tepee fire between the two logs. If your logs are very long you can build several tepee starter fires spaced evenly.
- Once the tepee fires are burning well continue to add wood between the logs whenever needed.
- Eventually, the logs themselves will start to burn from the inner side.
Not only do the logs provide a long-lasting burn (especially if they are green), but they also act as windbreaks making this an excellent fire lay in windy conditions. A variation on the parallel fire lay is the Finnish fire lay known as the ‘rakovalkea’ gap fire, or slit fire, which places the logs on top of each other, this provides a much longer slower burn. Read about the rakovalkea gap fire here.
5. Log Cabin Fire Lay
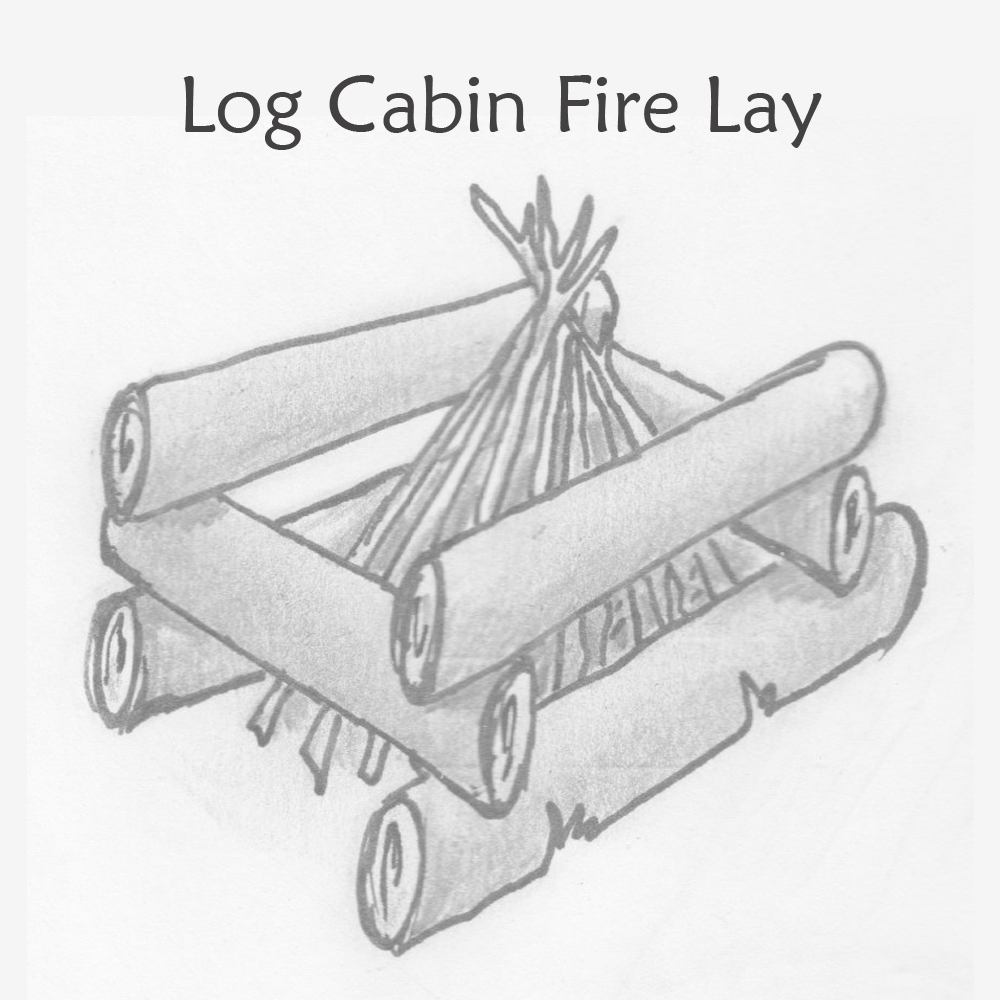 A log cabin fire lay is one of the easiest and most effective types of fire to build in a survival situation.
It consists of a layer of tinder and kindling wood arranged around a base, with progressively larger pieces on top, resembling the individual logs used to build a log cabin.
The log cabin fire lay ignites quickly and burns steadily, giving you plenty of warmth and light while maintaining its form even if it gets blown or stirred by the wind.
How to Build a Log Cabin Fire Lay
- Begin by gathering an assortment of dry tinder, such as birch bark, pine needles, dried grass, or small twigs no thicker than your finger. These should be arranged into loosely stacked bundles about 2 inches wide and 6 inches long.
- Next, arrange your kindling wood in two separate piles: one of the small pieces no thicker than a pencil, and another of slightly larger pieces no thicker than your wrist. You’ll use these to build the walls of your “log cabin” around the tinder bundle.
- To begin construction, take 4 or 5 of the small kindling pieces and lay them parallel to each other on top of the tinder, spaced about 1 inch apart.
- Now, take 2 or 3 of the larger kindling pieces and lay them perpendicular to the smaller ones, on top of and across the gaps between them. These will form the first layer of logs for your cabin fire lay.
- Continue in this manner until you have 4 or 5 layers of logs built around the tinder bundle, with gaps remaining at either end. Place any excess kindling pieces on top of these gaps to fill them in and make your fire lay more stable.
- Now that your cabin is built, use flint, a Ferro rod, fire piston, or a survival lighter to ignite the tinder bundle at its centre, sprinkling some dry grass or other fine fuel over it as needed to help it burn more easily. Soon, your fire will be burning brightly and providing you with warmth and light!
6. Lean-To Fire Lay
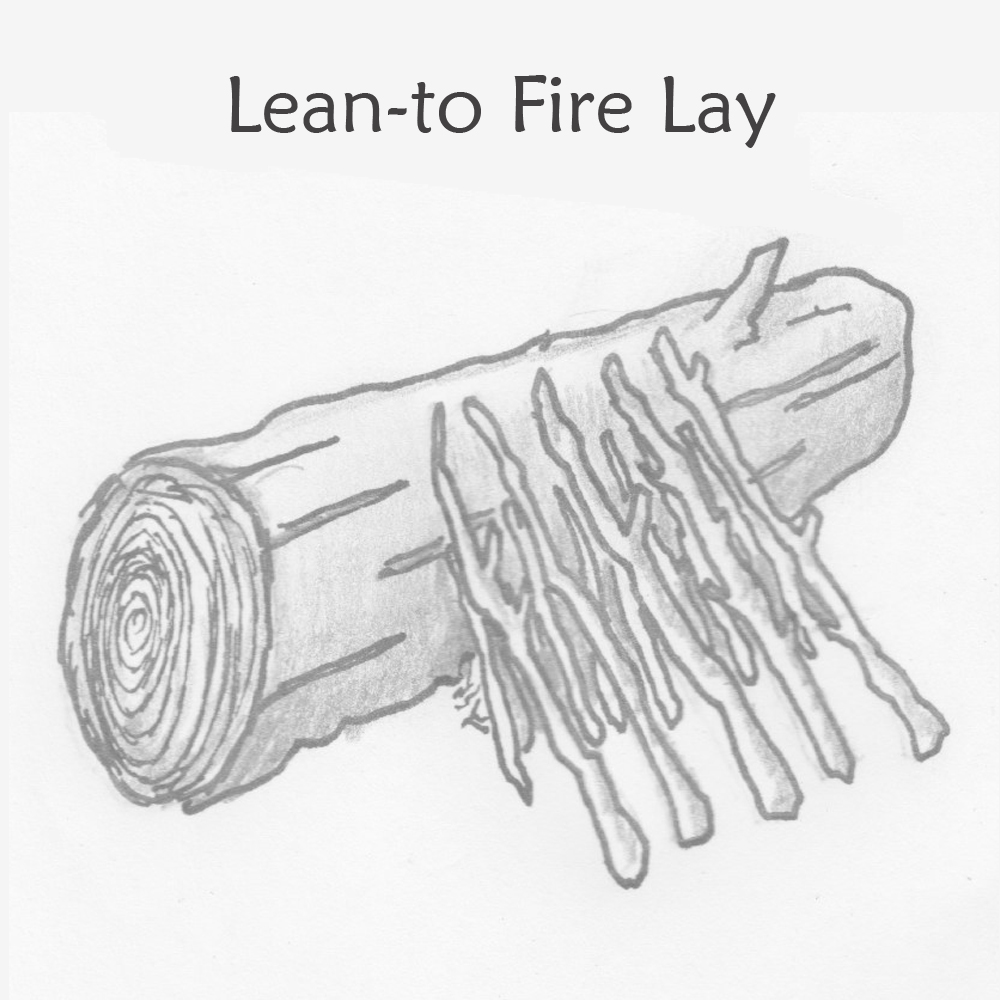 The lean-to fire lay is a solid campfire option if you have to build a fire in windy and wet conditions.
You will need a large log to act as a windbreak that you then build a fire up against. You need to build your lean-to fire on the downwind side of the log.
In windy and often rainy conditions it will still be difficult to get your fire going but you stand a much better chance of doing so with a lean-to-fire lay than with any of the other options listed here.
Building a Lean-to Fire Lay
- Position your log length-ways against the wind.
- Place your tinder right up against the downwind side of the log and then place smaller sticks and twigs over the tinder pile so they lean against the log and above the tinder pile. As if you were creating a shelter for the tinder.
- Lean slightly larger pieces of wood above the small sticks already leaning against the log.
- Continue to add ever-increasing pieces of wood, layer by layer until the desired size is achieved.
- Once lit, you can continue to add larger pieces of wood as needed.
- Eventually, the large windbreak log will also start to burn. When it does, you could always place another large log behind it to ensure you always have a windbreak.
Summing Up on Types of Campfires
There you have it, the six most commonly used fire lays. Each one provides you with something different. From fires that are better for cooking en masse to those that are easier to light and maintain in inclement weather.
Undoubtedly you will find a favorite among them that will be your go-to fire lay, but to get there you will have to learn and try all types of campfires. And hopefully, by doing so, you will pick up skills that will never leave you. Happy fire laying!
Types of Campfires and Fire Lays Pin